
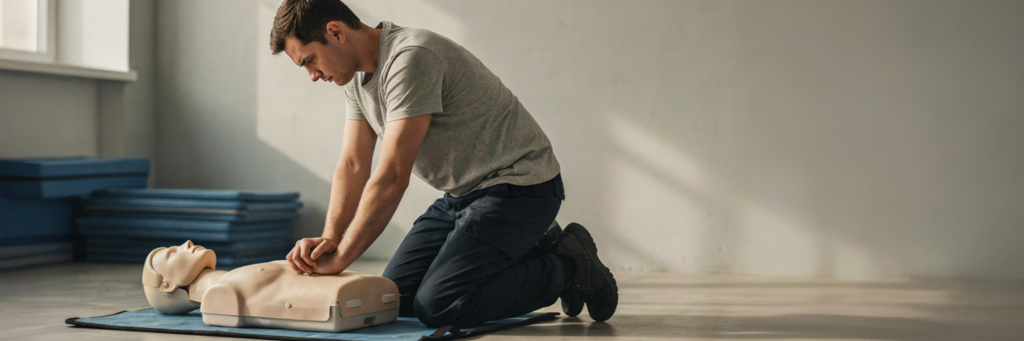
You did the course. You’ve got the certificate sitting in your inbox somewhere, HLTAID009, all official. So why does that little voice in your head still ask “but would I actually get it right if it happened right now?”
That’s the gap nobody really talks about. There’s a big difference between sitting through a training session and walking away actually knowing you’d nail it, hands in the right spot, pushing hard enough, breathing right, working the AED without fumbling. Most people leave a course with the theory ticked off but the muscle memory is still a bit shaky. That’s normal, nobody becomes an expert in one afternoon.
This one’s for anyone brushing up before their HLTAID009 course, coming back for a renewal refresher, or just checking if their technique is still solid between courses. No fluff, no scare tactics, just what proper CPR technique actually looks like, step by step, in plain language.
By the end you’ll know exactly what “doing it right” looks like, from hand placement through to using an AED, and how to keep that skill sharp long after the course wraps up.
What Is the Correct CPR Technique?
Quick answer, if you just need the steps in front of you right now:
- Check safety and response: make sure the scene's safe, then check if the person's responsive
- Call for help: 000, and get someone to grab an AED if there's one nearby
- Open the airway: tilt the head back, lift the chin
- Start compressions: 5 to 6cm deep, at a rate of 100 to 120 per minute
- Give rescue breaths: 30 compressions to 2 breaths
- Keep going and use the AED: follow the prompts, don't stop unless you have to
That’s the skeleton. Now let’s get into why each part matters and how to do it properly.
💡 Worth remembering: knowing the steps and doing them under pressure are two different skills, and technique is what closes that gap.
Why CPR Technique Matters More Than You Think
Here’s the thing nobody tells you in the course: knowing the steps and doing them under pressure are two completely different skills.
You can recite “30 compressions, 2 breaths” in your sleep. But when someone’s actually collapsed in front of you, adrenaline’s pumping, your hands might not do what your brain’s telling them to do. That gap between knowing and doing is exactly what proper technique training closes.
Technique isn’t just a formality, it genuinely changes outcomes. Compressions that are too shallow, too slow, or interrupted too often mean less blood getting to the brain and heart. Poor technique can be the difference between someone surviving and someone not making it, that’s just what the ANZCOR and ARC guidelines point to when they talk about compression quality.
There’s also skill decay to think about, which we’ll come back to later. Technique you don’t practice starts slipping within months, not years. So even if you smashed it in your course, that doesn’t mean the skill’s locked in forever.
The Difference Between Knowing the Steps and Doing Them Right
Think of it like knowing how to swing a golf club versus actually hitting the ball straight. You can watch a hundred videos, memorise the sequence. None of that guarantees your hands do the right thing when it counts.
That’s why the rest of this guide isn’t just “here’s what to do”, it’s “here’s what doing it right actually looks like”, down to the small stuff that trips people up.
Hand Placement and Body Positioning
This is where a lot of people go wrong without realising it, and it’s an easy fix once you know what to look for.
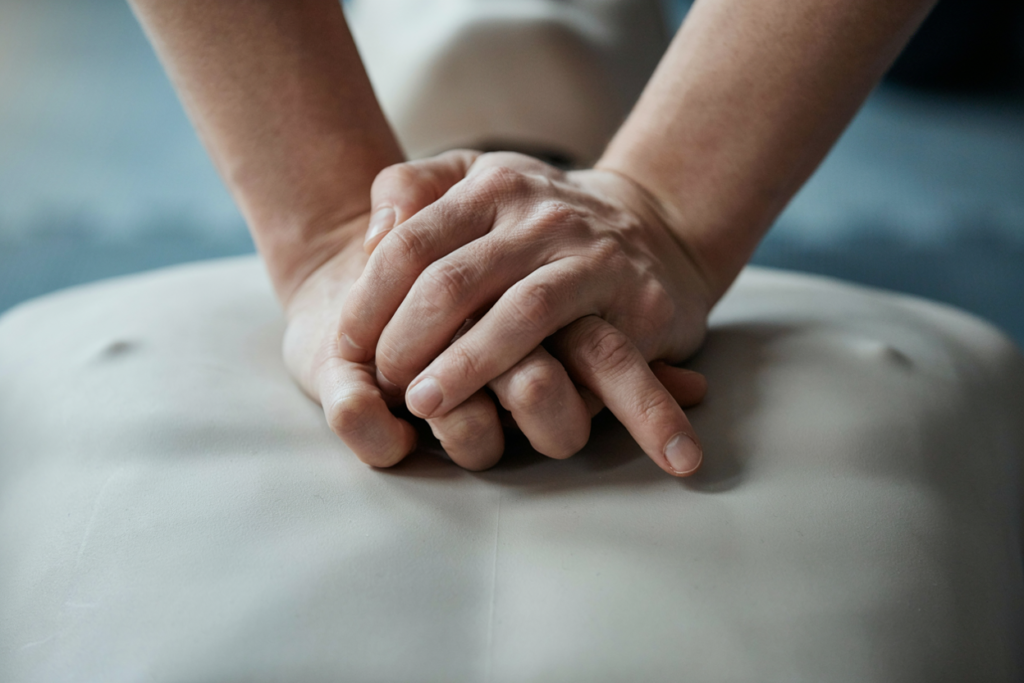
Where your hands go: Centre of the chest, lower half of the sternum (that’s the breastbone, right between the nipples roughly). Not up near the collarbone, not down near the ribs. Right in the middle, lower half.
Common mistake: Hands too high or off to one side. When people get nervous they tend to drift upward, toward the collarbone, because it feels safer somehow. It’s actually less effective, because you’re not compressing over the heart properly.
Body positioning matters just as much as hand placement:
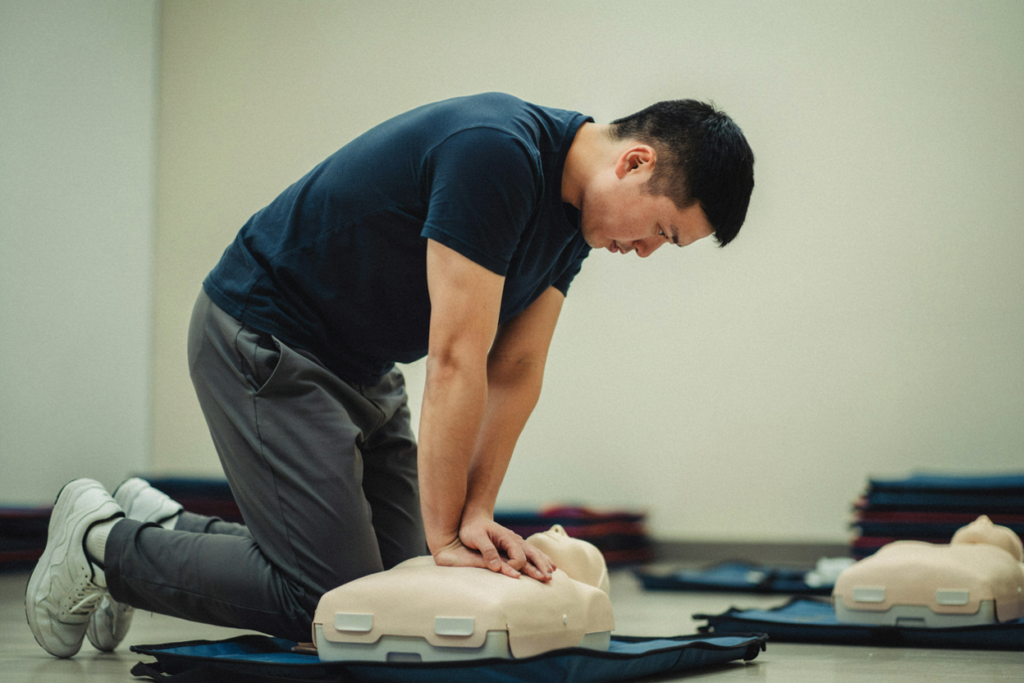
- Shoulders directly over your hands, not leaning back
- Arms straight, elbows locked, don't bend them
- Use your body weight to push down, not just your arm strength
If your arms are bent and you’re relying on arm strength alone, you’ll tire out in under a minute and your compressions will get shallower without you noticing. Straight arms, body weight, shoulders stacked over hands, that’s what lets you keep proper depth going for longer.
Common Hand Placement Mistakes to Avoid
- Hands too high: up near the collarbone instead of centre-lower chest
- Hands off to the side: not centred, which reduces compression effectiveness
- Interlocking fingers wrong: fingers should be laced together and lifted off the ribs, not pressing down on them
- Bent elbows: leads to arm fatigue and inconsistent depth
- Leaning back instead of over: reduces the amount of body weight you can transfer into each push
Get the position right once, and it becomes automatic, the goal is not thinking about it every compression.
📏 The two numbers to lock in: 5 to 6cm deep, 100 to 120 per minute. Everything else in this section is about hitting those consistently.
Compression Depth and Rate, Getting It Right
Depth and rate are the two numbers everyone tries to remember, and the two easiest to get wrong under pressure.
Depth: 5 to 6cm. That’s the ANZCOR guideline, and it’s deeper than most people expect the first time they try it properly. If you’re not pushing hard enough, you’re not moving enough blood.
Rate: 100 to 120 compressions per minute, roughly two per second. Think of it as a steady, driving tempo, not frantic, not lazy, just consistent and firm.
Full recoil matters too. Let the chest come all the way back up between each compression, don’t lean on it. If you’re resting your weight on the chest between pushes, the heart doesn’t get the chance to refill properly, and your compressions become less effective even if the depth and rate look fine on paper.
Compression quality has a direct, measurable effect on survival outcomes. It’s the actual mechanism keeping blood moving to the brain until help arrives.
Element | Target |
Depth | 5–6cm |
Rate | 100–120 per minute |
Recoil | Full, chest returns to normal position between compressions |
Ratio | 30 compressions : 2 breaths |
How to Know You’re Pushing Hard Enough (Without a Trainer Watching)
There’s no trainer standing over you in real life, so how do you self-check?
- You should feel some resistance: a proper compression on an adult chest takes real effort, if it feels too easy you're probably not going deep enough
- Your arms should tire quickly: if you're not fatigued within a minute or two, that's often a sign you're not pushing with enough force
- Use body weight, not just arms: rock forward from the hips rather than pumping with your elbows, it's more sustainable and more effective
- Practice the tempo: a steady two-per-second beat, out loud counting can help build the rhythm into muscle memory
Proper CPR is physically hard work. If it doesn’t feel like effort, you’re probably going too easy.
Airway and Rescue Breath Technique
Rescue breaths get skipped over a lot in memory of the course, compressions steal the spotlight, but this part matters too.
Step by step, head-tilt chin-lift:
- Place one hand on the forehead, gently tilt the head back
- Use two fingers under the chin to lift it up
- This opens the airway by moving the tongue away from the back of the throat
Getting an airtight seal: Pinch the nose closed, seal your mouth fully over theirs, breathe in steadily, not a sharp blast. Watch for the chest to visibly rise, that’s your confirmation the air’s going in.
The ratio: 30 compressions, then 2 breaths, straight back into compressions. Don’t pause for ages between breaths.
Rescue Breath Mistakes That Reduce Effectiveness
- No visible chest rise: usually means the seal isn't airtight, or the airway isn't fully open
- Breathing too fast or too hard: can push air into the stomach instead of the lungs
- Forgetting the head tilt: without it, the tongue can block the airway even with a perfect seal
- Taking too long between breaths and getting back to compressions: every second off the chest reduces blood flow, so keep the changeover quick
Two breaths, watch the chest, back to compressions. Keep it simple and keep it moving.
⚡ Don't overthink it: the AED talks you through every step, your job is to follow the prompts and keep compressions going around it.
Using an AED Correctly
AEDs look intimidating if you’ve never used one, but they’re built to talk you through it. You don’t need to be an expert to use one properly.
Pad placement: One pad goes on the upper right chest, the other on the lower left side, below the armpit. Most AEDs have a diagram right on the pads themselves, so you’re not guessing.
Don’t stop compressions to apply the pads. If there’s someone else around, get them to apply the pads while you keep compressing. If you’re on your own, keep compressions going for as long as possible before you have to pause to attach them.
Follow the voice prompts. The AED will tell you what to do, step by step, and tell you whether a shock’s needed. Trust it, it only advises a shock when one’s actually appropriate.
Stand clear during the shock. Make sure nobody’s touching the person when the AED delivers it, including you.
Continue CPR immediately after the shock. Don’t stop to check if it worked, get straight back into compressions. The AED will prompt you again when it’s time to reassess.
What to Do If There’s No AED On Site Yet
Keep doing compressions. That’s the whole answer. An AED helps, but it’s not the thing keeping the person alive in the meantime, your compressions are. If someone else is around, send them to find one while you keep going.
Technique Adjustments for Different Scenarios
Technique doesn’t change dramatically depending on the situation, but a few small adjustments are worth knowing.
Firm surface vs soft surface: CPR works best on a firm surface. On a bed or soft couch, compressions lose effectiveness because the surface absorbs the push instead of the chest. If it’s safe and quick, move them to the floor first.
Solo rescuer vs team or bystander-assisted: On your own, you’re doing everything, compressions, breaths, calling 000. With others around, delegate fast, one person calls 000, one grabs the AED, you focus on compressions. Swapping compressor duty every couple of minutes with another trained person also helps keep quality up, since fatigue sets in quicker than people expect.
Child and infant technique: Genuinely different from adult CPR, different hand positioning, different depth. Worth doing a dedicated course if this is relevant to you, it’s not something to wing based on adult technique alone.
Solo vs Team CPR, What Changes
- Solo: managing compressions, breaths and the call to 000 all at once, prioritise starting compressions first
- Team: assign roles fast, one on the phone, one on the AED, rotate compressors every two minutes
- Either way: compressions come first, everything else fits around them
🔁 Skill decay is normal, not a failure: a few minutes of practice between courses is all it takes to keep your technique from going fuzzy.
How to Keep Your Technique Sharp Between Courses
Technique doesn’t stick around forever on its own. Skills like this decay faster than people expect, we’re talking months, not years, before confidence and accuracy start slipping. That’s not a reason to panic, it’s just a reason to build in a bit of practice between courses rather than assuming the certificate alone means you’re covered.
A few ways to keep it sharp without needing a manikin or a full setup:
- Practice the hand position: on a couch cushion or your own knee, running through where your hands go and the straight-arm posture
- Practice the tempo: count out loud at the 100 to 120 beat, get the rhythm into your body
- Run through the sequence mentally: safety, call for help, airway, compressions, breaths, AED, keeps the order fresh
- Watch a quick refresher video occasionally: not a replacement for training, but enough to jog the memory between courses
- Practice with a partner: run through the head-tilt chin-lift motion on each other gently, just the positioning, not the actual breath
None of this replaces proper training, but it’s the difference between technique that’s fresh when you need it and technique that’s gone fuzzy after a while of not thinking about it.
Never let your CPR certificate lapse. Get renewal reminders when you book with us, so you’re never caught out wondering if you’re still current.
Getting the technique right isn’t about memorising numbers, it’s about building the kind of muscle memory that kicks in automatically when you don’t have time to think.
Go back over the pieces for a second. Hands centred low on the chest, shoulders stacked over them, arms straight so your body weight does the work. Pushing 5 to 6cm deep at a steady 100 to 120 beat, letting the chest fully recoil between pushes. A proper head-tilt chin-lift to open the airway, an airtight seal, watching for that chest rise. Thirty compressions, two breaths, straight back into it. None of these pieces are complicated on their own, it’s just that they all have to happen together, under pressure, without you stopping to think about each one.
That’s really what separates someone who did a course once from someone who’d actually step in and help. It’s not intelligence, and it’s not bravery either, it’s repetition. The people who feel calm and confident in the moment are almost always the ones who’ve run through the motions enough times that their hands just know what to do. You don’t need a manikin at home to get there, a cushion and a few minutes now and then is genuinely enough.
And the AED, don’t let it scare you off. It’s not a device that expects you to be a paramedic, it’s built for exactly the opposite, for someone who’s never touched one before and needs clear instructions in a moment that’s anything but calm. Pads on, follow the prompts, stand clear for the shock, straight back to compressions.
At the end of the day, this is a physical skill, and physical skills need upkeep the same way fitness does. You wouldn’t expect to stay match fit off one training session a year, and CPR technique works the same way. Keep it warm, keep it practiced, and when the moment actually comes, you’ll just be doing it.
Book Your First Aid Training Now
Fast, affordable, and nationally accredited training delivered by professionals who care
Frequently Asked Questions
Q.What is the correct CPR technique?
The correct sequence is check safety and response, call 000, open the airway, start compressions at 5 to 6cm deep and 100 to 120 per minute, give rescue breaths at a 30:2 ratio, and continue with the AED as soon as it's available. Getting each part right matters less than getting them all right together, under pressure, without stopping to think about each one.
Q.How deep and fast should CPR compressions be?
Compressions should be 5 to 6cm deep at a rate of 100 to 120 per minute, roughly two per second. Let the chest fully recoil between each push rather than leaning on it, since that's what allows the heart to refill properly between compressions.
Q.Do I need to give rescue breaths during CPR?
Rescue breaths at a 30:2 ratio are part of proper CPR technique, but if you're not trained or not comfortable giving them, compression-only CPR is still genuinely effective and far better than doing nothing at all.
Q.How do I use an AED correctly?
Place the pads as shown in the diagram on the pads themselves, avoid stopping compressions any longer than necessary while applying them, then follow the voice prompts, stand clear during the shock, and get straight back into compressions afterwards. The AED is built to talk you through every step, so you don't need prior experience to use one properly.
Q.What's the most common CPR mistake people make?
Hand placement is the mistake that comes up most, hands drifting too high toward the collarbone instead of staying centered on the lower half of the chest. Bent elbows and leaning back instead of positioning shoulders over the hands are close behind, both of which lead to shallower compressions and faster fatigue.
Q.How often should I refresh my CPR technique?
Technique tends to start slipping within months rather than years, so a bit of practice between courses, hand position, tempo, and mentally running through the sequence, is enough to keep it sharp until your next renewal.
Making first aid training more affordable for
every classroom
We believe every student deserves access to life-saving first aid knowledge. That’s why we offer specially reduced pricing for schools and educational groups. Whether you’re booking for a single class, a year group, or your entire school, our flexible packages make training more accessible and cost-effective — without compromising quality.
