

Picture the scene. You’re on site, your mate’s up near the switchboard, and something goes wrong. He’s down. You know your way around electrical work better than most, but at that exact moment, do you actually know what to do? Not “sort of know.” Actually, no hesitation.
That gap right there, between knowing electrical work and knowing rescue technique, is exactly what this article is about. Low voltage rescue techniques aren’t something you pick up on the job by osmosis. They’re a specific, trained skill set, and they’re a lot more than a first aid course with a panel photo slapped on the cover.
The Electrical Safety Act 2002 (Qld) is part of why this matters so much on Queensland sites, but honestly, the bigger reason is simpler than any regulation. It’s your mate on the ground, and you either know what to do or you don’t.
This article breaks down the real UETDRRF018 techniques: isolating power safely, approaching without becoming a second casualty, getting the person clear, and running CPR if it comes to that. We’ll also look at why this is treated differently to standard first aid, and how it’s actually assessed. First Aid Alive delivers UETDRRF018 training built around these exact techniques.
What Are the Techniques Used in Low Voltage Rescue?
Low voltage rescue relies on several core techniques: safely isolating the power source, approaching the casualty without becoming a second victim, using insulated tools or dry non-conductive materials to break contact, safely removing the casualty from the danger zone, and administering CPR if required. All of it performed under UETDRRF018 competency standards, not guesswork.
Core low voltage rescue techniques:
- Isolation technique. Identifying and safely isolating the LV source before you go anywhere near the casualty
- Safe approach technique. Assessing the scene properly, making sure you don't end up as casualty number two
- Casualty removal technique. Using insulated or non-conductive equipment to break contact
- DRSABCD assessment. Checking response, airway, and breathing once the casualty is clear
- CPR/defibrillation technique. Adapted response specific to an electrical-contact casualty
Five techniques. Each one builds on the last. Get the order wrong, or skip a step because you’re panicking, and the whole rescue falls apart. That’s the bit a lot of guys underestimate until they’re sitting in the practical assessment sweating through it.
🧠 Worth remembering: Skill with electrical systems and skill at electrical rescue are trained separately. One doesn't hand you the other.
Why Low Voltage Rescue Technique Is a Distinct Skill Set
Here’s something worth saying plainly, because a lot of tradies assume otherwise: being good at electrical work does not automatically make you good at electrical rescue. They’re related, sure, but they’re not the same muscle.
How This Differs From General First Aid/CPR Competency
A standard first aid course teaches you CPR, teaches you how to manage a bleeding wound, maybe a burn, maybe a broken bone. Good skills, useful skills, but generic ones. They’re built around a casualty who isn’t still connected to a live hazard.
Low voltage rescue is different because the hazard is still active when you arrive. You’re not just treating an injury, you’re managing a live danger zone while also trying to help someone who’s down inside it. That changes everything about how you approach, what you touch, and what order you do things in.
Why “Knowing Electrical Work” Isn’t the Same as “Knowing Rescue Technique”
You can be a switched-on, licensed electrician who’s spent fifteen years around panels and switchboards, and still freeze the first time you’re faced with a mate down near live gear. That’s not a criticism, it’s just how the brain works under real stress. Technical competence with electrical systems and trained rescue reflexes are two completely different things, built through two completely different kinds of practice.
This is exactly the gap UETDRRF018 training is built to close. It’s worth looking at First Aid Alive’s UETDRRF018 course page to see how the full course is structured around this.
👀 The rule instructors repeat most: Don't become a second casualty. Assess before you act, every single time.
Technique One: Isolating the Power Source Safely
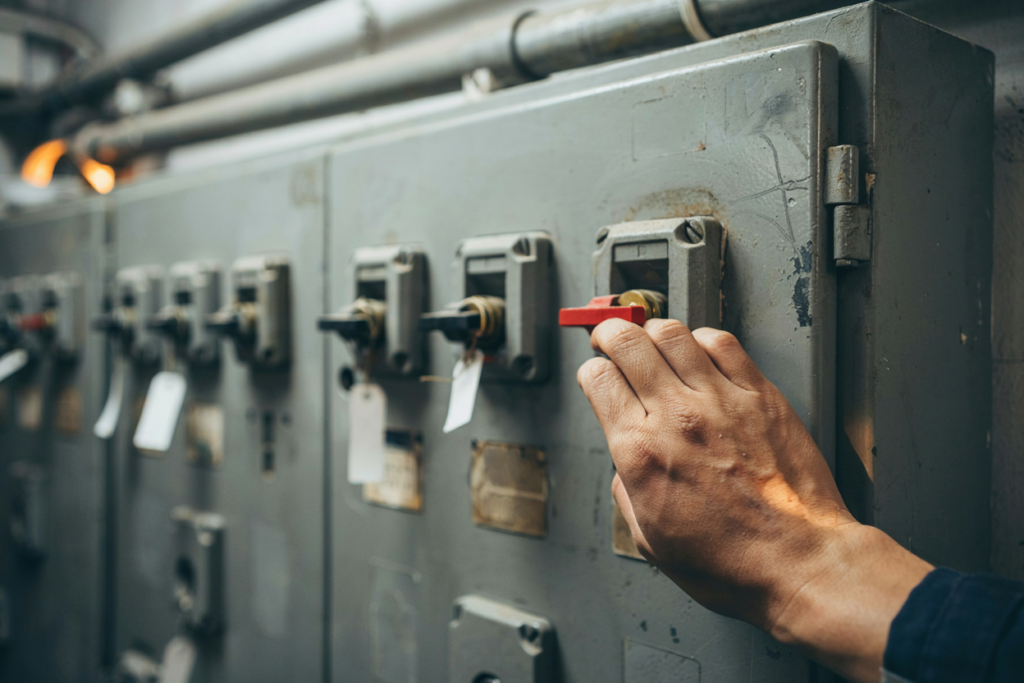
This is step one, and it’s non-negotiable. Before you touch anything, before you go near the casualty, the power source needs to be isolated. Everything else in the rescue depends on getting this right first.
Identifying the Isolation Point Under Pressure
Under normal circumstances, finding an isolation point on a switchboard isn’t hard. You do it every day. But add in adrenaline, a mate down on the ground, and panicked workers yelling at you, and a task that should take five seconds can take fifty. That’s why this gets drilled in training until it’s automatic, hands moving to the right point before the brain’s even finished processing what’s happening.
Common Isolation Mistakes That Cost Precious Seconds
- Assuming the obvious switch is the right one. On a complex board, it might not isolate the actual circuit involved
- Skipping verification. Isolating and then not confirming the isolation actually worked
- Panicking and reaching for the casualty first. The instinct to help immediately is strong, but it's the mistake that turns one casualty into two
- Losing track of which isolation point was used. Especially relevant if others arrive and need direction
Every one of these mistakes eats seconds, and in this situation, seconds matter more than almost anywhere else in a trade environment.
For the regulatory side of isolation procedure, the WorkSafe Queensland electrical safety code of practice sets out the detail behind why isolation is treated as step one, always.
Technique Two: Safe Approach and Scene Assessment
Power’s isolated. Now what? Now comes the part that every instructor hammers home harder than almost anything else in the whole course.
Assessing Before Acting: The First 5 Seconds
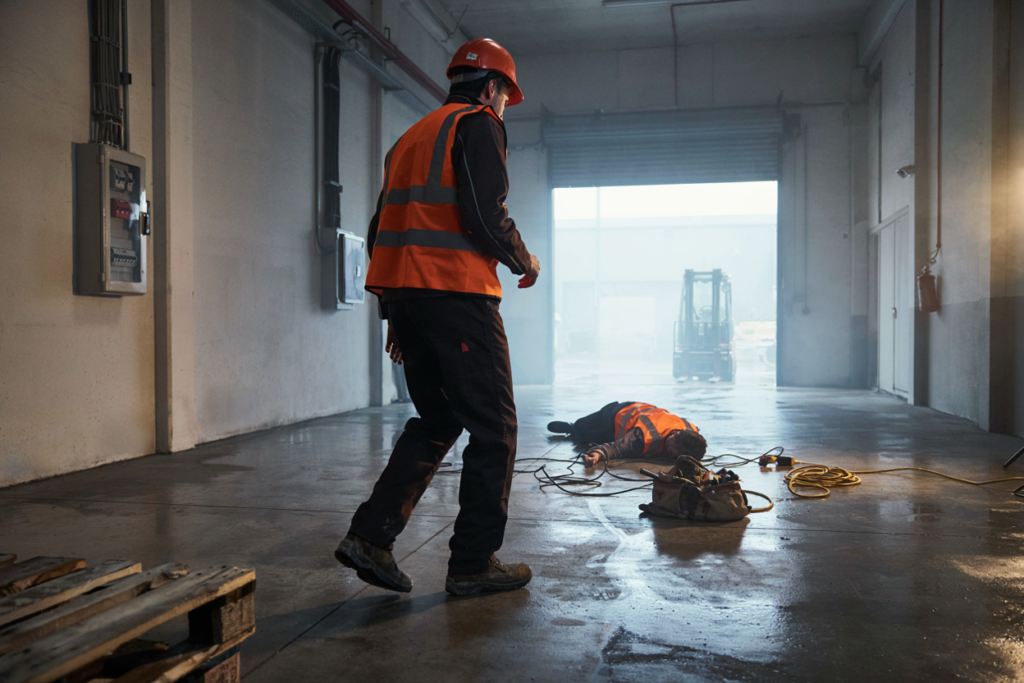
Those first five seconds after isolation are where a lot of rescues either go right or go wrong. Is the isolation confirmed? Is there anything else in the area that could still be live? Are there other hazards, wet ground, damaged equipment, anything that could catch you out the second you step forward?
It feels wrong, standing there assessing for even a few seconds while your mate’s down. Every instinct screams at you to just go. But those seconds are what stop this turning into a two-person emergency instead of one.
“Don’t Become a Second Casualty”: The Rule Instructors Repeat Most
If there’s one line drilled into every person who comes through UETDRRF018 training, it’s this one. Don’t become a second casualty. It gets said so often because it’s the single biggest risk in the whole scenario. A panicked approach that doesn’t check the scene first is how one down worker becomes two, and now nobody’s left standing who actually knows what to do.
This is the technique that separates trained rescuers from well-meaning bystanders. Good intentions aren’t a substitute for a trained, deliberate approach.
Technique Three: Casualty Removal Without Direct Contact
This is usually the part that sticks with people most from training, and it’s also where the emotional weight of the whole scenario really lands. Your mate is right there. Every part of you wants to grab him and pull him clear. You can’t. Not with bare hands, not without the right approach.
Using Insulated Tools and Non-Conductive Materials Correctly
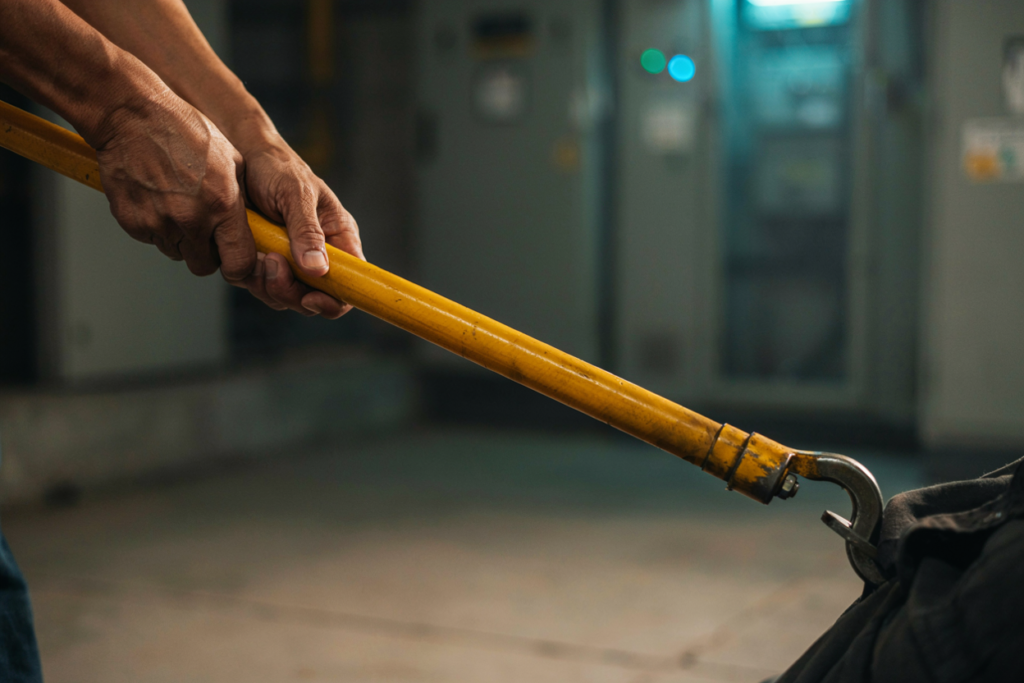
The whole point of this technique is breaking contact between the casualty and the electrical source without putting yourself in the circuit. That means insulated rescue hooks or other properly rated non-conductive equipment, used the right way, at the right angle, with the right footing. It’s not complicated once trained, but it needs to be trained, because the first time you do it can’t be the real thing.
What NOT to Use: Common On-Site Improvisation Mistakes
- Grabbing with bare hands. The single most dangerous instinct in this entire scenario
- Using metal tools or anything conductive. A spanner or a length of conduit is not a rescue tool
- Standing in water or on a wet surface while attempting removal. This turns you into part of the path
- Using damaged or unrated insulated gear. If it's not rated and in good condition, it's not safe to trust with a life
Use this, not that
Use | Don’t use |
Insulated rescue hook, properly rated | Bare hands |
Dry, non-conductive materials | Metal tools or conductive objects |
Solid, dry footing | Wet ground or damaged surfaces |
Equipment checked and rated | Damaged or unrated insulated gear |
This is the moment the whole course builds toward. If you get isolation and approach right, and then freeze or improvise badly here, all that earlier work doesn’t count for much. It’s why the training puts so much weight on this exact skill.
If you’re weighing up whether this kind of training is worth the time off the tools, this is the technique that answers that question. Book in for UETDRRF018 training with First Aid Alive and get it trained properly, not improvised on the day it matters.
Technique Four: DRSABCD Assessment on an Electrical Casualty
Casualty’s clear of the danger zone. Now you run your assessment, DRSABCD, same framework you’d know from any first aid course. Danger, response, send for help, airway, breathing, CPR, defibrillation. But an electrical-contact casualty isn’t quite the same as your standard first aid scenario, and it pays to know what’s different before you’re standing there doing it for real.
What’s Different Post Electrical-Contact: Burns and Cardiac Risk
Electrical contact can cause burns that aren’t obvious on the surface. The entry and exit points might look minor while real damage happens underneath, along the path the current took through the body. There’s also a genuine cardiac risk. Electrical current can throw the heart’s rhythm out, sometimes into cardiac arrest, even when the person looks conscious and talking right after contact. That’s why the assessment can’t be rushed, and why “he seems okay” is never the end of the story.
When to Escalate to CPR vs. Monitor and Wait for EMS
Not every electrical contact casualty needs CPR. Some will be responsive, breathing, talking. Others won’t be. The assessment is what tells you which situation you’re in, and it’s why DRSABCD gets run properly instead of skipped because the casualty “looks fine.” If breathing stops, or there’s no response and no normal breathing, that’s your trigger to move straight into CPR. If the casualty is responsive and breathing normally, the job becomes monitoring closely and getting emergency services on the way, because things can still change fast with an electrical casualty.
🫀 Time beats precision: A slightly imperfect AED pad placement with early defibrillation beats a perfect one that comes too late.
Technique Five: CPR and Defibrillation Response
If it’s come to CPR, everything trained up to this point has led here. The core CPR technique itself doesn’t change, compressions and breaths, same rhythm, same depth. But there are a few things specific to an electrical-contact casualty worth knowing.
CPR Adapted for Electrical-Contact Injuries
Electrical current can cause the heart to go into an abnormal rhythm rather than stopping outright, which is part of why CPR combined with early defibrillation matters so much here. The compressions keep blood moving to the brain and organs while you’re working toward getting a defibrillator on the casualty. Burns on the chest don’t change how you perform compressions, you still do them, in the same place, the same way.
For the full detail on CPR technique itself, that’s covered properly on First Aid Alive’s general CPR and AED training page, no point rebuilding all of that here.
AED Use Considerations Post-Electrical-Contact
An AED can still be used on a casualty who’s experienced electrical contact, and in a lot of cases it’s exactly what’s needed to get the heart back into a normal rhythm. Pad placement follows the same rules as any other CPR scenario, avoiding burns or visible injury sites where possible, but not delaying use of the AED because of it. Time matters more than precision placement here. A slightly imperfect pad position with early defibrillation beats a perfect one that comes too late.
How These Techniques Are Assessed in a UETDRRF018 Course
All five techniques come together in the practical assessment. This isn’t a multiple-choice test where you can guess your way through. It’s hands-on, scenario-based, and it’s designed to put you through something close to what an actual low voltage rescue would demand.
Practical Assessment Format: What to Expect
You’ll be run through a simulated rescue scenario from start to finish. Isolation, approach, casualty removal using insulated equipment, DRSABCD assessment, and CPR/AED response if the scenario calls for it. Assessors are watching for correct technique at every stage, not just whether you eventually get there. Sequence matters. Doing CPR brilliantly means little if you skipped proper isolation to get there.
It can feel like a lot of pressure in the room, but that’s kind of the point. The practical assessment is about as close as training can get to the real thing without an actual live panel involved, and that’s exactly why it sticks.
For more on how often this training needs repeating and what “current” actually means for site access, it’s worth reading through First Aid Alive’s currency and renewal explainer. And if you want to go deeper on the broader skill set beyond just technique, the LVR skills piece covers that ground too.
Getting Trained on the Real Thing
Reading through five techniques is one thing. Having them drilled into muscle memory, under a trained assessor’s eye, on real practical scenarios, is a completely different level of preparedness. That’s the gap between knowing about low voltage rescue and actually being able to perform it when someone’s counting on you.
If a mate goes down near live gear, you want to know exactly what to do. Not guess, not freeze, not improvise with the wrong tool. Know.
Book your UETDRRF018 Low Voltage Rescue course with First Aid Alive and get these techniques trained properly.
Conclusion
Five techniques, one goal. Get to a mate down near live gear and actually know what to do, not stand there hoping instinct fills in the gaps. That’s what this whole thing comes down to. Isolation first, always. Then a proper scene check before anyone moves a muscle toward the casualty. Then the removal itself, done with the right gear, not bare hands and good intentions.
What sticks out most, working through all this, is how much of it runs against natural instinct. Every part of you wants to rush toward someone who’s down. The training teaches your body to pause for those few seconds, check the danger, then act with the right tool in hand. That pause feels wrong in the moment. It’s the thing that keeps a rescuer standing instead of adding a second casualty to the scene.
DRSABCD and CPR round out the picture, but they only matter if everything before them went right. A casualty pulled clear the wrong way, or pulled clear by someone who’s now also in contact with the source, changes the whole outcome before CPR even becomes relevant. Sequence isn’t a technicality here. It’s the difference between a rescue that works and one that doesn’t.
None of this is theory that sits well in a manual and nowhere else. It’s built to live in the hands, trained until the sequence runs without needing to think through each step from scratch. That’s the only version of this skill worth having, because the moment it’s needed won’t come with time to look anything up.
Knowing electrical work and knowing how to perform a rescue near live gear are two different skills, and only one of them gets taught by years on the tools. The other one takes deliberate, hands-on training, run through until it’s second nature. That’s the gap worth closing, before the day comes when it actually matters.
Book Your First Aid Training Now
Fast, affordable, and nationally accredited training delivered by professionals who care
Frequently Asked Questions
Q.What are the techniques used in low voltage rescue?
Low voltage rescue relies on five core techniques performed in sequence: isolating the power source, approaching the scene safely without becoming a second casualty, using insulated or non-conductive equipment to remove the casualty from contact, running a DRSABCD assessment, and administering CPR or defibrillation if required. All of it sits under UETDRRF018 competency standards, and each step depends on the one before it being done correctly.
Q.Is low voltage rescue training different from a standard first aid course?
Yes. A standard first aid course is built around a casualty who isn't still connected to an active hazard, while low voltage rescue training deals with a scenario where the electrical danger is still live when the rescuer arrives. That changes the approach, the equipment used, and the order techniques are performed in, which is why it's treated as its own distinct skill set rather than a variation on general first aid.
Q.What equipment is used to remove a casualty from a live low voltage source?
Removal relies on insulated rescue hooks or other properly rated non-conductive equipment, never bare hands and never metal or conductive tools. The equipment needs to be checked and in good condition, since damaged or unrated gear isn't safe to rely on in a real rescue situation.
Q.Can CPR be performed on someone who has experienced electrical contact?
Yes, and the core CPR technique itself doesn't change. Compressions and breaths follow the same rhythm and depth as any other CPR scenario. The difference is understanding that electrical contact can throw the heart into an abnormal rhythm, which is why CPR combined with early defibrillation matters so much in this specific situation.
Q.How is low voltage rescue technique assessed in a UETDRRF018 course?
Assessment is practical and scenario-based, running a candidate through a simulated rescue from isolation through to CPR and AED response if the scenario calls for it. Assessors look at correct technique and correct sequence at every stage, since performing a later step well doesn't make up for skipping or rushing an earlier one.
Making first aid training more affordable for
every classroom
We believe every student deserves access to life-saving first aid knowledge. That’s why we offer specially reduced pricing for schools and educational groups. Whether you’re booking for a single class, a year group, or your entire school, our flexible packages make training more accessible and cost-effective — without compromising quality.
